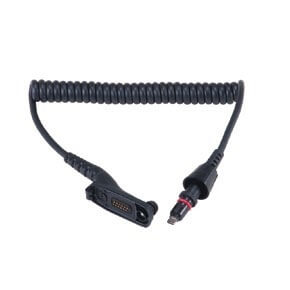
Motorola 3075336B17 Replacement Coil Cord
Replacement cord for the HMN4104, HMN4103, HMN4101 remote microphones
(Coiled cord and connector only - does not include the speaker-mic head)
To detach cable from Remote Speaker Microphone (RSM), remove the screw completely before rotating the collar Use TORX 6IP (T6) tip screwdriver
Note: Earlier versions of this cable may require you to insert a thin tool under the screw head to aid in screw removal
Cable Attachment
1. Align the cable connector with the RSM connector and insert into RSM. Ridge on connector faces the front.
2. Hold the RSM with the front facing you, then position the locking screw such that it faces the front.
3. Move the collar onto the RSM and rotate it into the locked position. The locking screw should now be at the right side of the RSM.
4. Tighten the screw using a TORX 6IP (T6) tip screwdriver.
Note: To avoid damage to screw head, do not overtighten. (Maximum torque: 2 in-lbs).
12 month warranty